File Upload
Introduction
Many WooCommerce stores sell products that require customer-provided files. Print shops need design files, custom gift stores need personal photos, and document services need PDF uploads. Without WooCommerce file upload functionality, customers must email files separately—creating confusion, delays, and potential order errors.
WooCommerce file upload fields allow customers to upload their files directly on product pages during checkout. Files are automatically attached to orders, streamlining the ordering process and ensuring you receive the necessary files for custom products and services.
In this comprehensive guide, we will explain why WooCommerce file upload is essential for your store, explore common use cases, and show you how to configure file upload fields with proper settings, restrictions, and best practices.
Why Add File Upload to WooCommerce Products?
- Streamlined Order Process
- When customers can upload files directly on product pages, the entire ordering process becomes smoother. No separate email exchanges, no confusion about which files belong to which order, and no delays waiting for customer files.
- WooCommerce file upload eliminates the back-and-forth communication that slows down custom orders and creates a professional, efficient experience for both you and your customers.
- Reduced Order Errors
- Email-based file submissions often lead to mistakes:
- Files sent to wrong email addresses
- Files attached to unrelated orders
- Missing files that delay fulfillment
- Files lost in spam folders
- WooCommerce file upload ensures files are directly linked to specific orders, reducing errors and ensuring you always have the files you need.
- Email-based file submissions often lead to mistakes:
- Better Customer Experience
- Customers appreciate the convenience of uploading files during checkout. They can see their files are attached, receive confirmation, and have confidence their order includes everything needed.
- WooCommerce file upload provides a modern, professional experience that builds trust and reduces cart abandonment.
- Improved Organization
- With WooCommerce file upload, all customer files are stored in a centralized location, linked to specific orders. This makes it easy to find files when fulfilling orders, managing customer requests, and maintaining order history.
- Security and Control
- WooCommerce file upload allows you to control which file types are accepted, set size limits, and manage file storage. This provides better security than email attachments and gives you control over your server resources.
Use Cases for WooCommerce File Upload
- Print Shops & Custom Printing – WooCommerce file upload is essential for print shops that need customer design files:
- Business Cards: Customers upload logo files and design specifications
- T-Shirts: Personalized designs and artwork uploads
- Banners & Posters: High-resolution design files for large format printing
- Photo Books: Multiple photos for custom photo book creation
- Calendars: Personal photos for custom calendar printing
- Brochures & Flyers: Design files for marketing materials
- Personalized Products – Custom product businesses rely on WooCommerce file upload for customer-provided content:
- Custom Phone Cases: Customer photos for personalized cases
- Engraved Jewelry: Personal images and text for engraving
- Customized Mugs: Photos and designs for printed mugs
- Personalized Pillows: Custom images and text for home decor
- Custom Invitations: Design files and personal information
- Photo Gifts: Personal photos for various gift products
- Document Services – Professional services use WooCommerce file upload to collect client documents:
- Resume Formatting: Clients upload resumes for professional formatting
- Document Translation: Source documents for translation services
- Legal Document Preparation: Client documents for legal services
- Thesis Binding: Academic documents for binding and printing
- Business Document Services: Company documents for processing
- Creative Services – Creative professionals use WooCommerce file upload to receive client materials:
- Photo Editing: Original photos for retouching and enhancement
- Logo Design: Reference images and brand materials
- Art Prints: Customer artwork for printing services
- Graphic Design: Source materials for design projects
- Video Editing: Video files for editing services
- E-Learning & Training – Educational services use WooCommerce file upload for course materials:
- Assignment Submission: Students upload completed assignments
- Portfolio Reviews: Student work for evaluation
- Certificate Programs: Required documents for certification
- Training Materials: Participant materials for courses
How to Add File Upload Fields (Step-by-Step)
Note: File Upload is a Premium feature of Extra Product Options for WooCommerce. The free version includes basic file upload functionality, while the premium version offers advanced features like AJAX upload, multiple file uploads, and enhanced file management.
- Step 1: Create an Options Group
- Navigate to WooCommerce > Products > Extra Product Addons in your WordPress admin
- Click “Add New” to create a new options group
- Give it a descriptive name like “Custom Design Upload” or “File Submission”
- Configure general settings for the options group
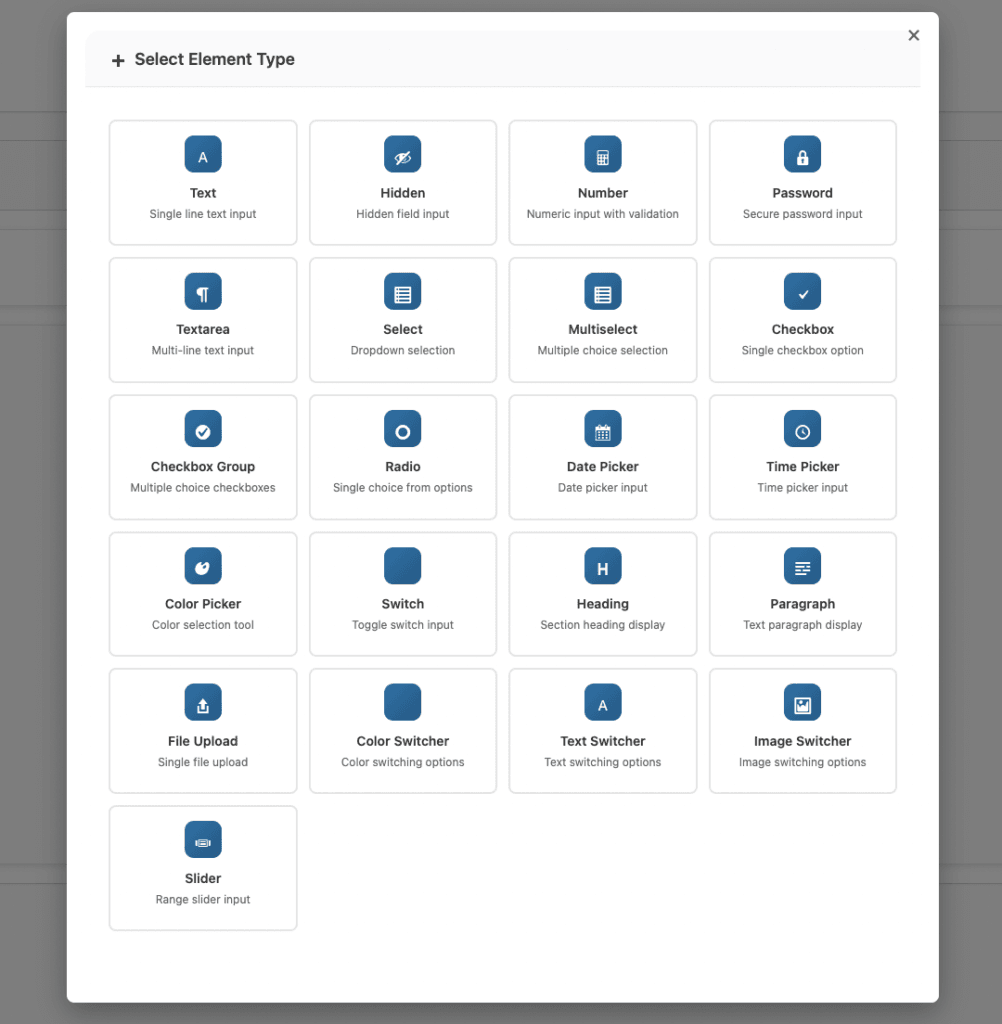
- Step 2: Add a File Upload Field
- Click “Add Element” or the “+” button to add a new field
- Select “File Upload” from the available field types
- The file upload field will appear in your field list
- Step 3: Configure Field Settings
- Configure the following settings for your WooCommerce file upload field:
- Basic Settings
- Field Status: Enable the field to make it active
- Field Name: Set a unique identifier (e.g., “design_upload”)
- Field Label: Enter the label customers will see (e.g., “Upload Your Design”)
- Field ID: Assign an ID for styling and scripting purposes
- Required: Check this if the file upload is mandatory for the order
- Advanced Settings (Premium)
- Enable AJAX File Upload: Files upload instantly when selected
- Allow Multiple File Uploads: Let customers upload several files at once
- Minimum File Size (KB): Reject files smaller than this size
- Maximum File Size (KB): Reject files larger than this size
- Allowed File Extensions: Specify which file types are allowed
- Basic Settings
- Configure the following settings for your WooCommerce file upload field:
- Step 4: Configure File Restrictions
- Set appropriate restrictions for your WooCommerce file upload field:
- File Size Limits
- Minimum Size: Prevents customers from uploading placeholder or empty files
- Example: 10 KB minimum ensures files contain actual content
- Maximum Size: Controls how large files can be
- Example: 2048 KB (2MB) for standard images
- Example: 5120 KB (5MB) for high-resolution photos
- Example: 10240 KB (10MB) for print-quality files
- Important: Your server’s PHP settings (upload_max_filesize and post_max_size) may override these limits. Contact your hosting provider if you need to increase server limits.
- Allowed File Extensions
- Control which file types customers can upload. Enter extensions separated by commas (without dots):
- For Print Shops:
jpg,jpeg,png,pdf,ai,eps,psd - For Photo Products:
jpg,jpeg,png,gif,heic - For Document Services:
pdf,doc,docx,txt,rtf - For General Use:
jpg,jpeg,png,gif,pdf
- For Print Shops:
- Control which file types customers can upload. Enter extensions separated by commas (without dots):
- File Size Limits
- Set appropriate restrictions for your WooCommerce file upload field:
- Step 5: Add Field Description
- Add helpful instructions in the field description:
- Required file dimensions or specifications
- Preferred file format recommendations
- Maximum file size information
- Any special requirements or guidelines
- Example Description:
- “Please upload your design file. Accepted formats: JPG, PNG, PDF. Maximum file size: 5MB. For best results, use high-resolution images (300 DPI or higher).”
- Add helpful instructions in the field description:
- Step 6: Assign to Products
- In the options group settings, select which products should use this WooCommerce file upload field
- You can assign to:
- Specific products
- Product categories
- All products
- Save the options group
- Step 7: Test the File Upload
- Visit your product page as a customer
- Test uploading a file
- Verify the file appears correctly
- Check that file restrictions work (try uploading a file that’s too large or wrong type)
- Complete a test order to ensure files are attached to orders
File Upload Settings Explained
- AJAX File Upload (Premium)
- When enabled, files upload immediately when the customer selects them, before form submission.
- Benefits:
- Instant Feedback: Upload progress indicator shows customers their file is uploading
- Faster Checkout: Files are ready before checkout completion
- Better Experience: No waiting until form submission
- Error Handling: Immediate error messages if upload fails
- Large Files: Better experience for files over 1MB
- When to Use:
- Files larger than 1MB
- Multiple file uploads
- When you want immediate file validation
- For better user experience
- Benefits:
- When enabled, files upload immediately when the customer selects them, before form submission.
- Multiple File Uploads (Premium)
- Enable this when customers need to submit more than one file.
- Use Cases:
- Multiple photos for a photo book
- Several reference images for design work
- Document packages with multiple files
- Before/after images for services
- Product variations requiring different files
- Benefits:
- Customers can upload all files at once
- Reduces the need for multiple orders
- Better organization of related files
- Streamlined workflow
- Use Cases:
- Enable this when customers need to submit more than one file.
- File Size Limits
- Minimum File Size – Prevents customers from uploading placeholder or empty files. Helps ensure you receive actual content.
- Examples:
- 10 KB: Ensures file contains some content
- 50 KB: For basic images
- 100 KB: For documents with content
- Examples:
- Maximum File Size – Controls how large files can be. Important considerations:
- Server Limits: Your server has its own upload limits
- Upload Time: Larger files take longer to upload
- Storage: Balance customer needs with server resources
- User Experience: Very large files may timeout
- Common Maximum Sizes:
- 2048 KB (2MB): Suitable for most images and documents
- 5120 KB (5MB): High-resolution photos and detailed designs
- 10240 KB (10MB): Print-quality files and large documents
- 20480 KB (20MB): Very high-resolution files (requires server configuration)
- Server Configuration: Check your server’s PHP settings:
upload_max_filesize– Maximum file upload sizepost_max_size– Maximum POST data size (should be larger than upload_max_filesize)max_execution_time– Script execution time limitmemory_limit– PHP memory limit
- Allowed File Extensions – Control which file types customers can upload. This is important for:
- Security: Prevents potentially dangerous file types
- Compatibility: Ensures you receive usable formats
- Clarity: Reduces confusion from incompatible files
- Common File Type Configurations:
- Images:
jpg,jpeg,png,gif,webp,heic - Documents:
pdf,doc,docx,txt,rtf - Design Files:
ai,eps,psd,svg,sketch - Archives:
zip,rar,7z - Video (if needed):
mp4,mov,avi
- Images:
- Minimum File Size – Prevents customers from uploading placeholder or empty files. Helps ensure you receive actual content.
Best Practices for File Uploads
- Set Appropriate File Limits
- Don’t allow unlimited file sizes. Consider:
- What’s the minimum quality you need? Set minimum size accordingly
- What’s your server’s upload limit? Don’t exceed server capabilities
- How long will customers wait? Balance file size with upload time
- What’s your storage capacity? Consider long-term storage needs
- Don’t allow unlimited file sizes. Consider:
- Restrict File Extensions
- Only allow file types you can actually use:
- Reduces Security Risks: Prevents potentially dangerous file types
- Prevents Confusion: Customers can’t upload incompatible formats
- Ensures Usability: You receive files in formats you can work with
- Better Organization: Easier to manage specific file types
- Only allow file types you can actually use:
- Use AJAX Upload for Large Files
- For files over 1MB, always enable AJAX upload. It provides:
- Progress Indicators: Customers see upload progress
- Better Error Handling: Immediate feedback on errors
- Improved Experience: No waiting until checkout
- Timeout Prevention: Better handling of large file uploads
- For files over 1MB, always enable AJAX upload. It provides:
- Add Clear Instructions
- In your field description, tell customers:
- Required File Dimensions: If specific dimensions are needed
- Preferred File Format: Which format works best
- Maximum File Size: So customers know limits
- Special Requirements: Any other important information
- Example: “Upload your design file. We accept JPG, PNG, and PDF formats. Maximum file size is 5MB. For best print quality, use 300 DPI resolution. Files should be in RGB color mode for digital printing.”
- In your field description, tell customers:
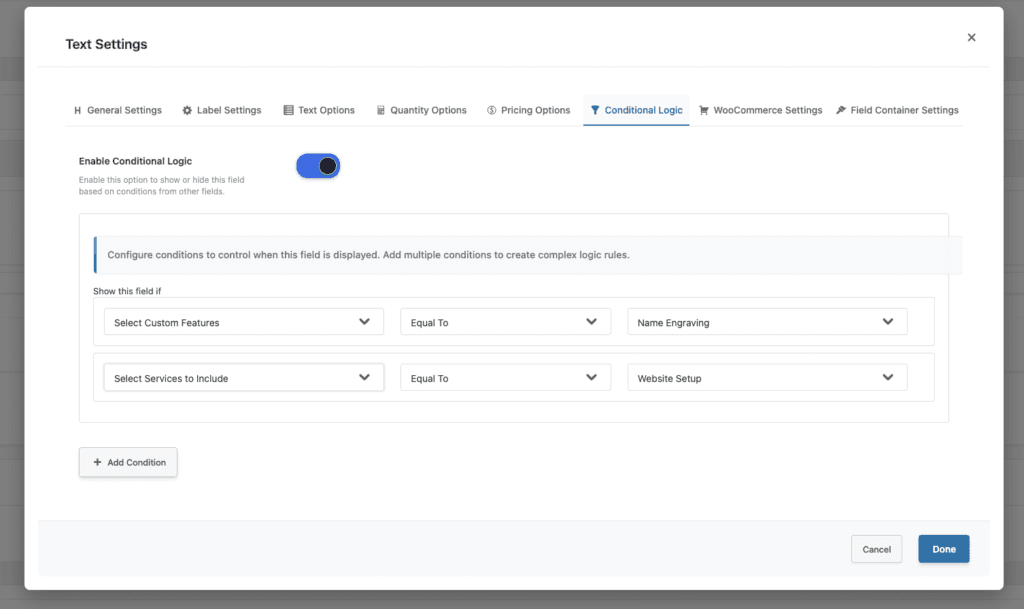
- Combine with Conditional Logic
- Show WooCommerce file upload fields only when relevant:
- Show upload field only when “Add custom design” is selected
- Hide upload when customer chooses a standard/pre-designed option
- Display different upload fields based on product variations
- Conditional file requirements based on other field selections
- This creates a cleaner, more intuitive experience and reduces confusion.
- Show WooCommerce file upload fields only when relevant:
- Test File Upload Functionality
- Regularly test your WooCommerce file upload fields:
- Test with different file sizes (small, medium, large)
- Test with different file types (allowed and disallowed)
- Test on mobile devices (ensure mobile compatibility)
- Test error handling (what happens when upload fails)
- Test multiple file uploads (if enabled)
- Verify files appear in orders (check order management)
- Regularly test your WooCommerce file upload fields:
- Monitor File Storage
- Keep track of uploaded file storage:
- Regular Cleanup: Remove old or unused files
- Storage Limits: Monitor server storage usage
- Backup Strategy: Include uploaded files in backups
- Security: Ensure files are stored securely
- Keep track of uploaded file storage:
- Provide Customer Support
- Be prepared to help customers with upload issues:
- Common Problems: File too large, wrong format, upload errors
- Clear Error Messages: Help customers understand what went wrong
- Support Documentation: Provide guides for customers
- Alternative Methods: Have backup options if upload fails
- Be prepared to help customers with upload issues:
Troubleshooting File Upload Issues
- Issue: File Upload Fails
- Possible Causes:
- File exceeds maximum size limit
- File type not in allowed extensions
- Server upload limit exceeded
- Network connection issues
- Solutions:
- Check file size against your settings
- Verify file extension is allowed
- Contact hosting provider about server limits
- Ask customer to try again or use smaller file
- Possible Causes:
- Issue: Files Not Appearing in Orders
- Possible Causes:
- Upload didn’t complete
- Files stored in wrong location
- Order processing error
- Plugin configuration issue
- Solutions:
- Check upload directory permissions
- Verify plugin settings
- Review order details in admin
- Check server error logs
- Possible Causes:
- Issue: Upload Takes Too Long
- Possible Causes:
- File is very large
- Slow internet connection
- Server processing delay
- AJAX upload not enabled
- Solutions:
- Enable AJAX upload for better experience
- Consider increasing server timeout limits
- Optimize file size recommendations
- Provide progress indicators
- Possible Causes:
- Issue: Wrong File Types Uploaded
- Possible Causes:
- File extension restrictions not working
- Customers renaming files incorrectly
- MIME type validation missing
- Solutions:
- Verify extension restrictions are set correctly
- Add clear instructions about file types
- Consider adding MIME type validation (advanced)
- Possible Causes:
Conclusion
WooCommerce file upload functionality transforms how you collect customer files for custom products and services. By allowing customers to upload files directly on product pages, you streamline the ordering process, reduce errors, and create a professional experience that builds trust.
Whether you run a print shop, offer personalized products, provide document services, or offer creative services, WooCommerce file upload ensures you receive the files you need when you need them. With proper configuration, file restrictions, and best practices, WooCommerce file upload becomes an essential tool for your WooCommerce store.
Start with basic file upload functionality, then explore premium features like AJAX upload, multiple file uploads, and advanced file management as your needs grow. Properly configured WooCommerce file upload fields improve customer satisfaction, reduce fulfillment delays, and help your business operate more efficiently.
Related Resources
Frequently Asked Questions
Find answers to commonly asked questions about our products and services.
Still have a question?
If you have any other queries, feel free to reach out to us. Our knowledgeable team is here to help!