
Where the estimate appears, and what it says. Everything here is on the Display tab, except the countdown, which lives with the cutoff on General.
Where it shows
Display → Where to show the estimate has a switch for each place:
| Location | What appears |
|---|---|
| Single product page | The badge, with the countdown |
| Shop / archive | The badge under each product in listings |
| Cart page | One overall estimate for the order |
| Checkout page | The overall estimate in the order summary |
| Order emails | The estimate frozen at checkout, under each item |
Turning one off affects only that place. A shopper reporting “it disappeared from the cart” usually means this switch, not a broken rule.
Position on the product page
Display → Position on product page moves the badge relative to the rest of the summary:
- After the price
- After the short description
- Before the Add to cart button
- After the Add to cart button
- After product meta
If your theme places it oddly, try another position — themes vary in what they put where, and this simply moves the badge earlier or later within the summary.
✓ Note
The position is relative to the product summary, not to what looks adjacent on screen. If another plugin adds a tall block of fields to the summary, “after the price” can end up well below the price visually. That is the theme’s layout, not a misplaced setting.
Message template
Display → Message template is the exact sentence shoppers read. Three tags are available, and clicking one inserts it:
| Tag | Becomes |
|---|---|
{start} | the earliest date |
{end} | the latest date |
{days} | the window in days, e.g. 2–5 days |
The default is Estimated delivery: {start} – {end}. Others that work well:
Get it by {end}Arrives in {days}Order today, delivered {start} – {end}
Tip
You do not have to use every tag. A single-date message is often stronger than a range.
Pro — Wording per location lets the product page, shop listings and cart each say something different. Leave a field empty and it falls back to the template above. Order emails keep their own wording and are not affected.
Date format
Display → Date format controls how each date is written, using WordPress date formats:
| Format | Produces |
|---|---|
M j, Y | Sep 14, 2026 |
j F Y | 14 September 2026 |
d/m/Y | 14/09/2026 |
D, M j | Mon, Sep 14 |
Icon and colour
Display → Icon offers Truck, Calendar, Clock and Box.
Display → Accent color tints the icon and the countdown on your storefront. This affects the shop only — the admin screen keeps its own colours whatever you pick.
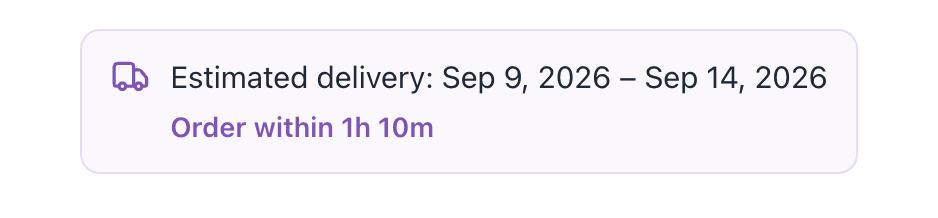
The urgency countdown
General → Show “order within” urgency countdown adds a live timer beside the estimate, counting down to today’s cutoff — Order within 2h 36m.
Once the cutoff passes it does not vanish and leave shoppers guessing: it changes to Cutoff passed — ships next business day, and the date has already moved forward to match.
✓ Note
The countdown appears on the product page only. It is the one element here that is about persuasion rather than information, and it is off in one click if it does not suit your shop.
Custom CSS
The badge markup is deliberately simple and every part carries a class:
| Class | Element |
|---|---|
.edfw-delivery | the badge |
.edfw-product | on a single product page |
.edfw-archive | in shop listings |
.edfw-cart | on a cart or checkout line |
.edfw-delivery__text | the sentence |
.edfw-countdown | the timer |
So a rule like this restyles the badge everywhere:
.edfw-delivery { border-radius: 0; font-weight: 600; }Placing it anywhere else
To put an estimate somewhere the switches do not cover, use the shortcode on a product template or in a product-specific block:
[edfw_estimated_delivery]