
Estimated Delivery Date shows shoppers when their order will arrive, worked out from your own dispatch schedule rather than a guess.
◷ 10 min
● Beginner
Requires: WooCommerce 7.0+
WordPress 6.2+
Install
- Upload the plugin under Plugins → Add New → Upload Plugin, or install it from the WordPress plugin directory.
- Activate it.
- Go to WooCommerce → Estimated Delivery Date.
WooCommerce 7.0 or newer is required. There is no zone setup, no shipping method to add, and nothing to configure before an estimate appears.
You already have an estimate
Activation creates one delivery rule for you: 2 to 5 business days, on every product. Open any product on your storefront and the estimate is already there.
✓ Note
That default is deliberate. A plugin that shows nothing until it is configured looks broken, and the most common setup — one delivery window for the whole shop — is the one you get without touching anything.
So the first question is not “how do I switch it on”, it is “are those numbers right for my shop”.
Set your own delivery window
WooCommerce → Estimated Delivery Date → Delivery Rules
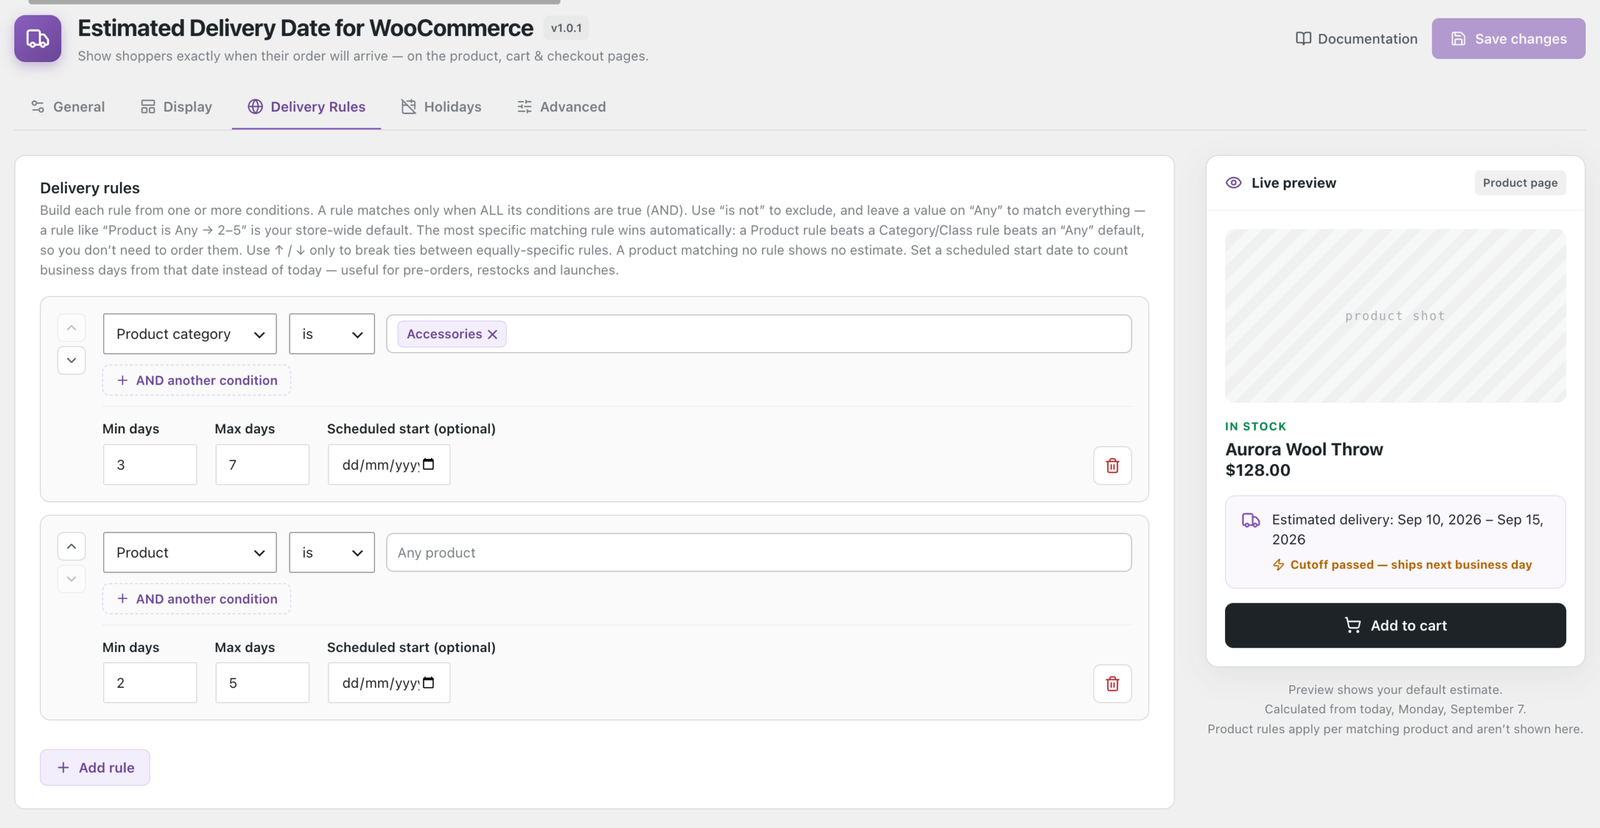
The rule created for you reads Product is Any, with Min days and Max days beside it. Change those two numbers to your real dispatch window and press Save changes.
Min and Max are counted in business days — days you actually dispatch on. Weekends and holidays are skipped automatically, so a 2–5 day window ordered on a Friday afternoon lands on the following week rather than on Sunday.
Tell it when you ship
Two settings decide which days count, and both are on the General tab.
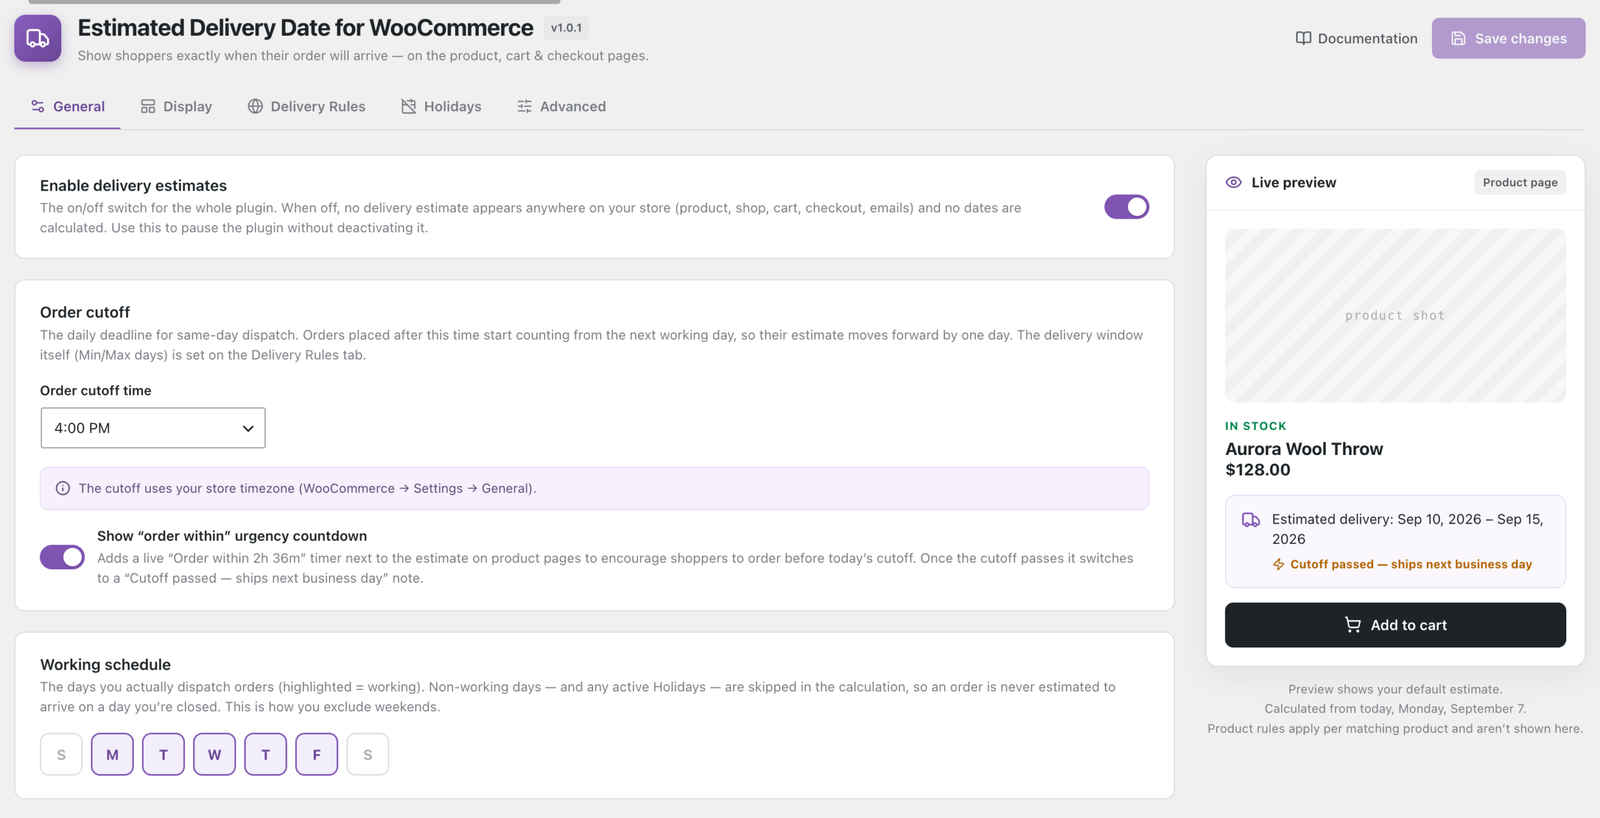
Working schedule is the row of day pills, S M T W T F S. Highlighted days are days you dispatch. Monday to Friday is on by default — click Saturday if you ship then, click a weekday off if you do not.
Order cutoff time is your daily deadline for same-day dispatch. Orders placed after it start counting from the next working day, so their estimate moves forward by one. It uses your store’s timezone, set under WooCommerce → Settings → General — not the shopper’s.
⚠ Warning
Get the cutoff right before anything else. It is the setting that most often makes a date look “one day out”, and the effect is invisible until you check the storefront at a time of day that crosses it.
Add your closures
WooCommerce → Estimated Delivery Date → Holidays
Add the one-off dates you do not dispatch on: public holidays, stock-takes, the week you close over Christmas. Each one is skipped in the calculation exactly like a non-working weekday, so an order is never promised on a day nobody is there to pack it.
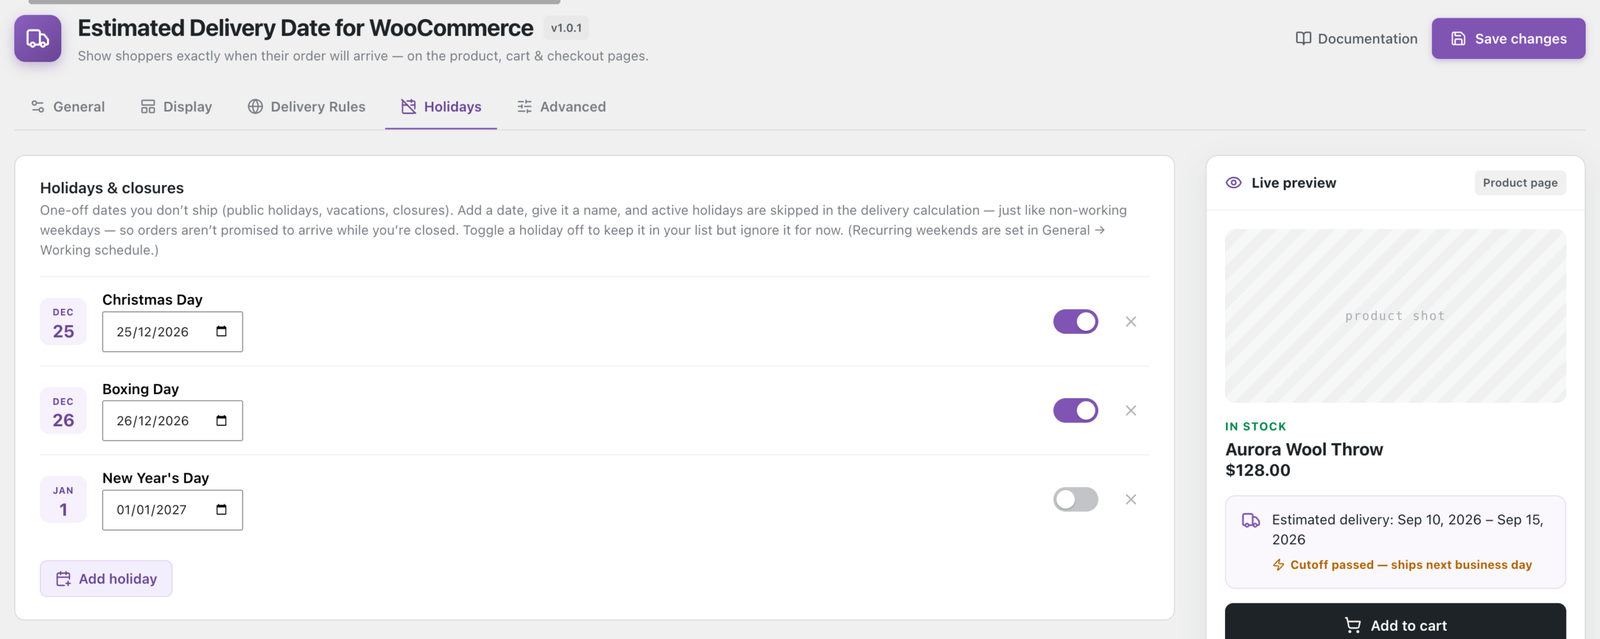
You can switch a holiday off without deleting it, which is useful for a date that moves each year.
✓ Note
Recurring weekends belong in General → Working schedule, not here. Holidays are for one-off dates.
Pro can fill this list from a country’s national public holidays for this year and next, generated on your own site with no external service.
Check what a shopper sees
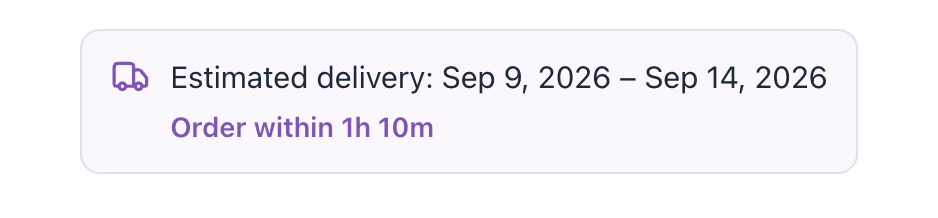
The Live preview panel sits beside the settings and updates as you type. It shows the product-page badge exactly as your storefront renders it, countdown included, so you can get the wording right without loading the shop.
Tip
The preview shows your default estimate — the rule that matches every product. Rules targeting particular products or categories apply per product and are not previewed.
When an estimate will not appear
Some products never show one, by design:
- Virtual products — nothing is being delivered.
- External / affiliate products — you are not fulfilling the order.
- Products that are not purchasable, such as one with no price.
⚠ Warning
It is the Virtual checkbox that matters, not Downloadable. A downloadable product that still ships a physical item is not excluded. The two checkboxes sit next to each other in the product editor and are easy to conflate.